The Comeback Kid

The Comeback Kid

Cover story previously published in Rite Up, 2021 – Issue 3.

by Hayley Hair

The Comeback is Bigger Than the Setback

On the wide-open field under the scorching summer sun, soccer player Lillian lines up her kick and launches the soccer ball through the air hurtling toward the goal. Today she’s in practice leading up to her select soccer team’s upcoming season. Last fall’s season looked dramatically different as an anterior cruciate ligament (ACL) rupture and meniscus tear took 12-year-old Lillian and her parents not only by surprise but also, unfortunately, out of the game.

“I was in the far corner and a girl hit me from the side,” Lillian says. “I heard several pops, and then I was on the ground in tears. It was just the most painful thing.” Lillian was able to limp away after the injury, but it hurt, and the pain persisted. Lillian’s mother, Debbie, set up a doctor’s appointment to have Lillian’s knee examined. “I had this vision that an ACL injury was excruciating, and you couldn’t walk,” Debbie says. “She was in pain, but not what I thought it would look like. It hurt, but she was mobile.”

Following X-rays and an MRI, Lillian’s injury was confirmed. “Just hearing the doctor say, ‘torn ACL,’ I couldn’t think of anything. My mind just stopped,” Lillian says. Later that day and feeling overwhelmed about her future sports goals, Lillian searched online to find out what professional athletes experienced injuries like hers. Then she saw her soccer idol’s name pop up on the list. “It’s happened to a lot of professional players, like Alex Morgan, who I’ve looked up to my entire life. That kind of comforted me.”

The Ins and Outs of ACL Injuries in Children

The ACL is a stabilizing ligament in the central part of the knee that stabilizes translation and rotation of the joint and is typically injured in pivoting, twisting and agility sports. Over the last several decades, recognition of ACL injuries has increased, and rupturing the ACL is particularly common in female soccer.

One hears about torn ACLs frequently in adult sports, but what happens when the injury presents in children? Lillian’s X-rays showed that her growth plates were still open, signaling plenty of growing in her future, so her best bet for care would be provided by a pediatric orthopedic specialist. She was referred to Scottish Rite for Children’s Orthopedics and Sports Medicine Center in Frisco and into the care of pediatric orthopedic surgeon Philip L. Wilson, M.D., assistant chief of staff and director of the Center for Excellence in Sports Medicine.

For a growing athlete, the experts at Scottish Rite for Children have unparalleled experience providing non-operative and arthroscopic care to treat common sport-related injuries including concussions, ligament injuries and cartilage conditions in the knee, ankle, shoulder, elbow and hip.

“Some ACL injuries may not need to be reconstructed if there are no cartilage injuries or shifting or instability of the knee,” Wilson says. “Unfortunately, this is less common, and despite rehabilitation, many children need surgery due to laxity in their ligaments and their high activity levels.” For Debbie and Sergio, Lillian’s parents, Wilson was the perfect fit for determining their daughter’s care.

“Dr. Wilson sat with me and my daughter and answered every question I had under the sun about the data, his experience and his research. He was an open book about everything,” Debbie says. “The whole team was positive. They made us feel like we had a great plan in place and that it’s all going to be just fine.”

The Right Surgical Technique for Patients Like Lillian

That research Wilson reviewed with the family is the novel ACL surgical technique for growing athletes that he and pediatric orthopedic surgeon Henry B. Ellis, M.D., created and subsequently published in the American Journal of Sports Medicine and presented at the annual meetings of the Pediatric Orthopedic Society of North America and the American Orthopedic Society of Sports Medicine.

“We have found in our research at Scottish Rite studying a particular technique that we developed that this can cut ACL reinjury rates in half,” Wilson says. “Female adolescent soccer players, like Lillian, have a particularly high risk of reinjury, sometimes as high as 25%, which is the highest that we have recorded in youth and young adult sports. Adding the stabilizing ligament helps reduce that reinjury risk. She also had cartilage repair, which is common is 70% in our ACL injury population.”

Lillian had a quadriceps tendon autograft for her ACL repair. She also had a lateral tenodesis with her iliotibial band, which means Wilson used a strip of tissue from the side of the knee to add a secondary stabilizing ligament that helps control rotation and protect the knee.

“There’s nothing you can tell a parent to put them at ease when their child is going through the actual procedure,” Sergio says. “There’s nothing routine when someone puts your child under anesthesia, but when you are in a facility like Scottish Rite, in a place where the doctors are proven performers, that gives you peace of mind.”

Scottish Rite provides world-class care for patients including access to psychologists, nutritionists, physical therapists, athletic training staff, specialized nurses, advanced practice providers and many others who play a significant role in ensuring complete physical and mental readiness to return to play. “We are fortunate to have the resources to take care of the whole patient,” Wilson says. “We also have a keen interest in the research surrounding these injuries and contribute to that research in terms of factors predictive of injury, surgery techniques, patient outcomes and potential complications of treatment.”

Novel ACL Reconstruction Diagram

Returning to Sports After Surgery and Physical Therapy

Finding the proper treatment and completing the surgery are a huge jump start to recovering from an ACL injury, but getting back on the field and ready to safely return to competitive game play takes time. For Lillian, it was nine months.

“When you see your child be very physically active, and then one day, it all comes crashing down, that for me as a parent was deeply concerning,” Debbie says. “I knew the journey to get anywhere near that level of activity again was going to be many, many months.”

By helping Lillian understand that recovery could take up to a year, Wilson worked alongside the family to get her healthy both physically and mentally to return to soccer. “Every time I went to visit him, he said I was doing great and healing ahead of schedule, and that made me want to work even harder,” Lillian says. “I pushed my hardest through every single drill and activity I did, and here I am, and I feel better than ever.”

Wilson says the biology of internal healing in the knee takes at least nine months. That time allows for the new ligament graft to heal to the bone and grow a blood supply. That also includes building back the muscle and strength to regain control of the leg to protect the surgically constructed knee. “Return prior to that time leads to increased reinjury rates,” Wilson says. “Scottish Rite has a stepwise progression of strengthening, agility and neuromuscular control activities to help prepare patients to return to sports.”

Following Scottish Rite’s well-established, highly successful physical therapy program, Wilson recommended Lillian participate in Scottish Rite’s training classes to foster further recovery and prepare for the functional testing and physician’s clearance required for her to safely return to soccer. Following months of rehabilitation, many patients need additional strengthening and emotional support to trust their injured leg, beyond what can typically be received during traditional physical therapy. “I just felt so much comfort even though I didn’t know anyone there,” Lillian says. “Being around the people who have had an injury and who are around my age, it just felt so heartwarming. We would help each other no matter what, and it was just an amazing feeling.”

Back on the Field

Lillian followed her sports medicine team’s instructions very closely. With a great deal of hard work, and added support and encouragement from her parents and her teammates, she successfully passed her functional test.

The new soccer season has arrived, and Lillian’s parents love seeing her back out there. “Whenever you have to see them take their first tumble to the ground, you kind of hold your breath, but she popped right up,” Debbie says. “She just needs to be playing and doing what she loves. For the longer term, the more she’s out there, the more she’s going to learn to trust that knee.”

Lillian has learned a great deal during her ACL injury recovery and from her care at Scottish Rite for Children. “Throughout my entire recovery, I always had one quote in the back of my head — ‘the comeback is always stronger than the setback,’” Lillian says. “I carried that with me throughout my entire recovery. It’s been quite an experience, but I think it’s going to all be worth it.”

Read the full issue.

Keeping Up with the Count: Hip Health in Dancers

Keeping Up with the Count: Hip Health in Dancers

Dancers and other performing artists place demands on their hips that are unlike those of other athletes. Movements push the range of motion of their hips to extreme ends from an early age. They must have the flexibility for turnouts, leaps, or grand battements, and also absorb dramatic forces from leaps and jumps. All of this while maintaining impressive limb control and stability of their support and gesture limbs over sustained periods.

Key Considerations for Hip Health for Dancers

  1. Mobility in the hip and surrounding muscles.
  2. Balance and stability in the pelvis and core.
  3. Managing training volume.

Hip Mobility
Turnout and extreme ranges of motion during dancing and other performing arts often require more than “normal” hip mobility. For some, the end of the thigh bone in the hip is naturally in a position of retroversion, which allows for the extreme external rotation needed for turnouts. Others have soft tissue laxity, also called joint hypermobility, that predisposes them to successfully achieve the extremes in rotation, extension, flexion, and abduction (out to the side, such as a la seconde) required for their art form. Dancers with natural hypermobility may be more likely to continue, whereas others may “self-select” out of the sport.

Dancers that are not born with these factors may acquire laxity in the joint with many years of training and aggressive stretching of the muscles and soft tissue that make up the hip capsule.

Proper supervision and a comprehensive program are necessary to ensure the stretching does not cause hypermobility in the lower spine. Additionally, extreme motions may cause damage to the labrum, a soft tissue rim that stabilizes the hip in the socket. Therefore, prompt response to signs of pain with mobility should be addressed to avoid damage to the soft tissue, and ultimately the bones in the hip.

Pro Tip: When the core stabilizer muscles don’t support the lower spine, the hip muscles, including the flexors or hamstrings, are forced to provide support. This protective tightness is an undesirable compensation and can be corrected by doing core stabilization exercises.

Pelvic and Core Stability
Mobility of the hip and leg is dependent on having a stable platform. Core stability means abdominal strengthening to many, but there are deeper muscles that must be considered, including:

  • Gluteal muscles – deep hip rotators that help to maintain active turnout and appropriate knee alignment in the posture leg with grand plies and more.
    • Gluteus maximus (hip rotation and extension)
    • Gluteus medius (hip rotation and abduction)
  • Transverse abdominis – deep abdominal muscles

Imbalances and weakness of these muscles cause stress on other joint tissues, including the capsule, labrum, and ligaments. Stretching or stressing beyond their limits can cause pain and injuries in those non-muscular tissues, which then shifts more demand to the muscles around the hip to provide extra support at end ranges of motion. The body then uses other muscles like the hip flexors to stabilize the hip and support a high volume of hip flexion with a turned-out leg, as seen in dance.

A consequence of this demand or overuse of a muscle is muscle tendinitis, the inflammation of the tendon part of a muscle. This condition worsens when there are sudden spikes in the frequency or duration of training, particularly when there is inadequate support from the core to control the pelvis during repeated hip flexion movements.

Stability Exercises:

Abdominal Hollowing Technique
To prevent this chain of compensation, a dancer can learn how to activate the transverse abdominis, the deep abdominal muscles. These muscles help to create a stable base prior to limb movement. Activation of these muscles is described as a “hollowing” technique as the belly button is pulled inward toward the spine. This contrasts with a “bracing” technique that activates the superficial abdominals.

Pro Tip:
A dancer should be able to do an active straight leg raise without any arching of the lower back during the movement. For added abdominal/core muscle activation, use a band for a pull-down during the straight leg raises. This prepares a dancer for flexion associated with high kicks and grand battements without anterior pelvic tilt.

Gluteal Medius Strengthening

Example exercises:

  1. Single leg glute bridge
  2. Kneeling, side plank, hip abduction raises
  3. Clamshell side planks
  4. Side plank development

Pro Tip: It is important to learn to use the gluteus medius instead of the spinal muscles, called the quadratus lumborum, with abduction motions out to the side (a la seconde) or in the posture leg.

Manage Training Volume
Poor form and muscle fatigue can cause undesirable compensations with other soft tissues and muscles, and may lead to direct tissue injury in the joints or muscles. As overuse injuries worsen with time, performance suffers when the muscles are fatigued.

Pay attention to sudden increases in training duration or intensity, such as fall preparation for The Nutcracker, when added to typical training classes because it can leave a dancer vulnerable to injury. Dancers should take a day off one to two times each week for recovery. Proper rest can help prevent injuries, so you stay healthy throughout the season.

Hockey Player Has No Regrets After Making a Hard Call

Hockey Player Has No Regrets After Making a Hard Call

In June of 2020, 15-year-old hockey player Daniel was training after an outstanding season as captain of his team. It appeared that they had a great shot at going all the way in the upcoming season when everything suddenly went wrong. As he was going for the puck, Daniel’s knee collided with the knee of a player on the opposing team, and then he crashed into the boards. Daniel and his father, Andrew, knew that something was wrong, but they didn’t realize just how bad it was.

Daniel’s coaches had always recognized his speed since he started playing at ten years old. “They say that Danny’s speed is one of his best assets,” says Andrew. “They say that you can teach skills, but you can’t teach speed, which is a great benefit for him.” Daniel remained positive and motivated as he discovered the extent of the injury and his treatment options.

At the Scottish Rite for Children Orthopedic and Sports Medicine Center in Frisco, an X-ray and MRI showed that Daniel had an osteochondral fracture of the patella (kneecap) and a loose body in the joint, likely a piece of bone or cartilage. When Daniel was hit on the outside of his knee, his kneecap likely slipped out to the side and scraped the thigh bone, causing the bone and cartilage injury. This injury is often called a patellar subluxation or, more generally, patellar instability. Scottish Rite for Children offers care of complex cartilage conditions, including osteochondral fractures like Daniel’s.

Pediatric orthopedic surgeon Henry B. Ellis, M.D., offered Daniel two approaches for treatment. One option was to focus on the osteochondral injury on the patella. This option would likely get him back on the ice faster, which was an important consideration for Daniel. When the patella slipped, a vital ligament stretched and tore. Without fixing it, the knee would be vulnerable, and another similar injury would have put Daniel at risk for knee issues as he got older. The second option Ellis suggested was to combine the first option with the reconstruction of the medial patellofemoral ligament (MPFL), even though it would take him out of the game for at least six months. To add to the complexity, Ellis recognized that Daniel had a discoid meniscus, meaning the cartilage in his knee was misshapen. Though relatively uncommon and often without symptoms, this pediatric condition is very familiar to Ellis, so he recommended reshaping it during the surgery as well. Together, these procedures would leave Daniel with much better stability and a much better outlook for the future. Even though Daniel wanted to get back on the ice as soon as possible with his team, he and Andrew decided to go with the comprehensive plan. “Dr. Ellis explained everything to us very clearly, so it made the decision much easier, even though it wasn’t what Danny wanted at first,” says Andrew.

An MPFL reconstruction requires time for tissue healing and an intensive rehabilitation program to return to activity and progress to sports safely. “It was pretty hard at first, but my therapist told me that I was doing pretty well and that I was progressing pretty fast, so that kept me encouraged,” says Daniel.

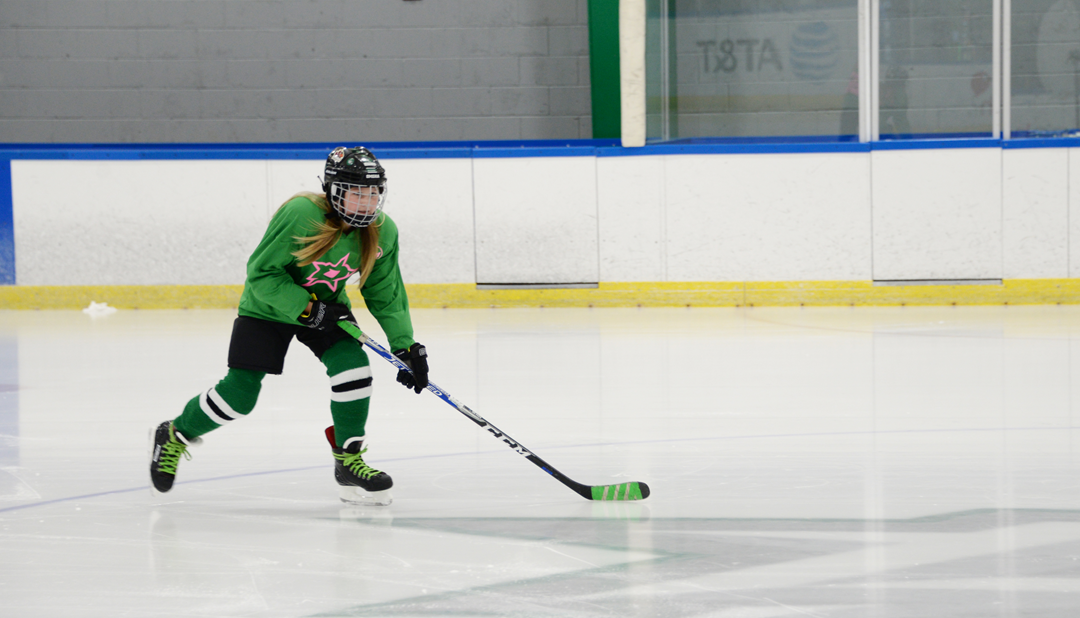
When Daniel first returned to the ice about four months after surgery, he was feeling less confident than he did before his injury. His teammates and his coach encouraged and supported him, which helped ease his concerns about using his full speed again. When Daniel scored his first goal after his full release back to hockey, everyone cheered wildly. Daniel says that he is doing great now and that he has total confidence in his knee. Daniel and his team, the Texas Warriors, worked hard all year, and in March of 2021, their hard work paid off when they won the state championship, and he has the ring to prove it. Daniel and his team also played in the 2021 USA Hockey National Tournament as state champions of Texas.

Many patients, including Daniel, acknowledge Ellis’ ability to explain the options and include them and their families in the decision-making process. Daniel is also thankful that he did not settle for the quickest option. “Not always taking the fastest option can be a good life lesson,” says Daniel. “Don’t get discouraged and keep working hard to get back where you were.” Some athletes tell us they end up better than they were, and it looks like Daniel is on that path, too!

“Daniel had to make a tough decision and was mature enough to think about the long term more than the short term,” says Ellis. “Turns out he made the correct decision as both short-term and long-term goals were met. Congrats, Daniel, on a well-deserved ring and championship!”

We enjoy hearing about our current and former patients’ success stories. Tell us about your MVP

Evaluating Adolescent Ankle Pain

Evaluating Adolescent Ankle Pain

Content included below was presented at the 2021 Pediatric Orthopedic Education Symposium by sports medicine physician Jacob C. Jones, M.D, RMSK.

You can watch the full lecture and download this summary.

The ankle is one of the most commonly injured body parts in children of all ages. An ankle sprain usually occurs when the ligaments, which support the three ankle bones, are stretched beyond their normal limits. This often occurs when the ankle is twisted or rolled inwards. When this happens, the ligaments can stretch or even tear. An evaluation by a pediatric orthopedic specialist can help to prevent potential complications. Usually X-rays are required to make a diagnosis and treatment will depend on multiple factors, including the specific type of injury and age of the patient.

Ankle Anatomy

Lateral Ankle
There are three major ligaments in the lateral ankle:

  • Anterior talofibular ligament (ATFL)
  • Calcaneofibular ligament (CFL)
  • Posterior talofibular ligament (PTFL)

Medial Ankle
The ligaments on the medial aspect are grouped together into a ligament complex called the deltoid ligament.

Posterior Ankle
The main area of concern here is the Achilles tendon which connects the calf muscles down to the calcaneus, or heel bone.

Anterior Ankle
There are two major areas to focus on in the anterior ankle:

  • The high ankle
    • Several ligaments in the upper part of the ankle are grouped together.
    • Ankle syndesmosis
      • These are the ligaments that connect the tibia to the fibula.
  • The low ankle
    • This is where the tibia and fibula interact with the main ankle bone (talus).
      • Tendons and other tissues coarse over the anterior portion of this joint

History
Knowing the patient’s history is vital for diagnosing the problem. There are two key things that physicians should ask when covering the patient’s history:

  1. Was there an injury?
  2. If there was an injury, can the patient recreate the injury?

Sometimes adolescents or younger populations have trouble verbalizing what happened to them, but they can demonstrate it with their injured ankle, their uninjured ankle or with their hands. This can help physicians determine what to focus on during the physical exam and help guide the diagnosis, evaluation and treatment.

Inspection

  1. Look at all aspects of the ankle to make sure that there are no breaks in the skin, bruising, swelling, erythema or deformity.
  2. Have the patient stand if they are able to do so. This gives a view of their overall alignment.
    • Look at the knees to see which way they are facing.
    • Assess for curvatures in their lower extremities, which may play a role in their pain or may have been a contributing factor to their actual injury.
  3. Have the patient turn around to look at them from the posterior aspect.
    • Look at their alignment from this view, paying particular attention to the lower aspect to see what their alignment looks like down low.
    • Check for any kind of curvature or angulation of their heel that may also contribute to their pain and injury.
    • Look at their arches to see if they are flat (pes planus) or if they have a high arch (cavovarus foot) that may be contributing to the pain that they are having or may have contributed to their injury.

Active Range of Motion
Testing a patient’s active range of motion shows how far they can move their joint on their own. Have the patient move their foot in circles one way and then the other. Then have them move in each particular plane, by dorsiflexing up, plantar flexing down, internally rotate or invert then have them externally rotate and move their toes as well.

Neurovascular Check
Visually inspect and check the dorsal aspect of the midfoot and palpate for the dorsalis pedis pulse. The posterior tibialis pulse is located just posterior to the medial malleolus. Assess sensation on the distal aspect of the foot.

Palpation
Palpating helps to define the painful area and often guides next steps, such as X-rays. Pain may be apparent during the evaluation, however, asking questions throughout is recommended. To avoid missing any structures, this assessment should be consistent for any ankle injury. Start at the very top, just below the knee, and methodically work down.

  1. Palpate between the tibia and the fibula to see if there are potential injuries in that area.
  2. Palpate over the anterior aspect of the ankle
  3. Palpate over the medial malleolus and the deltoid ligament.
  4. Palpate the lateral malleolus, and then around it. Assess all three lateral ligaments: ATFL, CFL and PTFL
  5. Palpate all over the foot to make sure there isn’t any pain there.
  6. Palpate the posterior aspect. Squeeze on and around the Achilles tendon and move down to the calcaneus.

Special Tests
These special maneuvers help physicians in their evaluation of the patient’s ankle.

Anterior Drawer Test (ATFL Laxity)
This test attempts to separate the lower aspect of the ankle from the upper aspect of the ankle by moving the ankle anteriorly. The ATFL is being stressed with this test.

  1. Get a good firm grip on the lower leg with your non-dominant hand. You will be providing counter-traction with that hand and you don’t want it to move.
  2. With your dominant hand, cup the heel with a firm grip and try to move that ankle anteriorly without the foot flexing too much. While doing this, feel how much the ankle moves and look for an endpoint when the ATFL ligament becomes taught.
    • With an alternative method, you wrap the thumb of your dominant hand over the anterior aspect of the ankle. This can give more of a firm grip and more control while moving the ankle anteriorly.
  3. Always check the contralateral side to see what the patient’s baseline is. This comparison can tell you if the ligament is injured, and/or not functioning the way it should be.

Talar Tilt/Stress Inversion Test
This test stresses these lateral ankle ligaments. You can tilt the foot the other way to stress the medial ankle ligament.

  1. Get a firm grip of the lower leg to make sure that doesn’t move.
  2. With your other hand, get a full grip on the whole foot, not just the toes.
  3. Slowly tilt it in a clockwise motion on the left ankle.

Thompson Test (Achilles Tendon Injury)
This test is to evaluate for an Achilles tendon injury. When the calf muscles contract, it causes the Achilles tendon to pull that calcaneus upward which in turn, causes the foot to go plantar flex, or move downward a little bit. If there is no movement, you have a positive test. This could be because of a tear of the Achilles tendon.

  1. Have the patient lay prone on the exam table with both feet are dangling off the edge. Make sure the patient is relaxed and comfortable.
  2. Squeeze the calf muscle. As you squeeze the calf muscle, look to see if the foot plantar flexes.
  3. If it does plantar flex, it tells you the Achilles tendon which connects the calf muscle and the foot is intact.
  4. Always compare with the other leg.

Squeeze Test (High Ankle Injury)
The squeeze test evaluates for a high ankle injury and can be performed during the palpation assessment. When you squeeze the upper parts of the leg, the lower part of the leg to tries to spread apart. If there is an injury in this area, there will be more movement, or more commonly, more pain. Patients will point to this area to show where they are having pain.

  1. Squeeze at the upper aspect of the tibia and fibula. You are trying to squeeze those two bones together. Work your way down and squeeze in different areas.
  2. What you are looking for when you squeeze is if there is more movement in the distal aspect of the tibia and fibula, or more commonly, if they have pain in that area.

External Rotation Testing
This test is also for high ankle injuries. With external rotation, the talus is going to try to move apart the tibia and the fibula. And so if there is an injury to the high ankle, it is going to cause that part or that high ankle area to have some pain or to try to move apart.

  1. Make sure that you have a good grip on that lower extremity to keep it stable.
  2. With the palm of your other hand, externally rotate that patient’s foot while making sure the patient is relaxed. You are looking for pain and for a little bit more movement.

Resistive Range of Motion
Resistive range of motion testing assesses the patient’s strength.

  1. As the patient inverts, everts or externally rotates, plantar flexes and dorsiflexes, push against them to provide resistance and to test how strong they are.
  2. Compare to their other leg.

Gait Evaluation
Observe the patient walk down a hallway, not just in an exam room. Look for any type of limp or asymmetry. Make note of the patient’s alignment and their cadence. A conversation or other distraction can help them walk more naturally.

Double and Single Leg Toe Raise
A functional test like the double or single leg toe raise assesses the strength of the patient’s lower extremity and how their pain is in regards to their movement in a weight bearing position.

  1. Have the patient go up on their toes, starting with both feet at once to see if they are able to do this or not. This shows how strong they are and how confident they are on their ankles.
  2. Have the patient do several single-leg toe raises on each leg
    • If the patient can do this, it shows that their ankle is pretty strong and they can likely start getting ready to return to sport.
    • If the patient cannot do this, they are still too injured to return to sport.

Ankle X-rays
It is most common to order three views of the ankle after an ankle injury. Foot X-rays may be needed if the exam findings include midfoot or distal complaints. Standard three views of the ankle includes:

  1. Anterior/Posterior (or AP) – gives a good view of the anterior aspect of the joint.
  2. Mortise – this one is slightly angled from the AP which allows you to see the lateral malleolus at a different angle and lets you see the joint between the talus and the tibia and fibula well. You can also see the area of the high ankle without any bony overlap.
  3. Lateral – with this view you can see the posterior aspect of the ankle and the calcaneus very well.

Conclusion
The ankle is a complex and highly mobile joint. Due to the demands of sports and activities, the ankle is a risk of injury and should be fully evaluated for bony and soft tissue injuries. Watch the 20-minute lecture which includes video demonstration of the ankle exam on a pediatric patient.

Building Muscle in Young Athletes: Making Nutrition Count

Building Muscle in Young Athletes: Making Nutrition Count

Young athletes in strength-based and power sports may desire to increase muscle mass for better performance or to help them as they start a new position on their team. “While there are many nutrition supplements available, it’s important to understand that these may not be safe for children and teens,” says Taylor Morrison, MS, RD, CSSD, LD. “A young athlete at the appropriate developmental stage should be able to achieve his or her goals with with food and beverages alone.”


Before setting any goals, it is also important to understand that young pre-pubertal athletes will not gain muscle mass like an adult because they do not yet have the level of hormones needed to support these gains. While he/she can still build muscle, the level of hormones required to support larger gains in muscle, like those often desired by young male athletes, are not present until after puberty.

When ready, here are important facts to know about how the young athlete’s nutrition can help build muscle for sport.

What builds muscle?

With the appropriate hormones present, these are necessary components for building muscle:

  1. Adequate calories: Getting enough calories or increasing daily calorie intake is essential to building muscle.
  2. Protein: Protein is the key nutrient for building muscle and should be included in all meals and some snacks.
  3. Carbohydrates: Carbohydrates are the main source of energy for working muscles and the brain. They should be present in all meals and snacks to provide energy and allow protein to build desired muscle mass.
  4. Resistance training: Exercises like lifting, pushing and pulling an outside force create necessary changes within the muscle that result in longer, stronger and bigger muscles.

Easy ways to increase calories

  • Increase the number of meals or snacks eaten per day. Most young athletes need a minimum of 3 meals and 2 snacks per day.
  • Add spreads to sandwiches and wraps such as avocado, hummus, pesto and mayonnaise.
  • Choose heartier or thicker slices of bread.
  • Include oatmeal or fresh smoothies with breakfast or snacks and add items such as milk, yogurt, peanut butter, almond butter, honey, fruit, flax or chia seeds.
  • Choose nutrient-dense cereals such as: granola, Raisin Bran®, shredded wheats and Grape-Nuts®.

Ideas for increasing protein at meals and snacks

  • Add an egg or Greek yogurt to breakfast.
  • Choose granola bars with whole grains, nuts or seeds.
  • Include a string cheese with a snack.
  • Add a glass of milk or chocolate milk to meals or snacks.
  • Include beans, nuts and seeds in salads.

Carbs to include with meals & snacks

  • Whole-grain bagels or English muffins.
  • Fresh or dried fruits.
  • Starchy vegetables like white potatoes, sweet potatoes, peas, corn, winter squash.
  • Rice, pasta, quinoa, couscous, etc.
  • Milk or yogurt (also great sources of protein and calcium).
  • Whole-grain crackers, cereals, granola bars.

Keys to Success:

  • Be realistic: Young, pre-pubertal athletes will not gain muscle mass like an adult.
  • Work on body composition changes during the off-season. Trying to make big changes during the season could lead to decreased performance or injury.
  • Plan for gradual muscle gain. Include a well-balanced diet and a developmentally appropriate strengthening program.
  • Remember, the overall goal is optimal performance. Measure improvements in performance (jumping height, running distance, etc.), not a number on the scale.
  • Focus on real food: Rely on healthy, high-calorie and nutrient-rich foods instead of supplements and protein powders.
  • Get enough sleep and manage stress. This is often forgotten for achieving body composition or weight goals, but it is very important.

If unsure where to start, it’s always a good idea to work with a certified sports dietitian who can help you create a plan, recommend products and support you as you work towards your goals.

Not sure if your athlete is ready to build muscle? Read “Building Muscle in Young Athletes: Getting Started

Visit our sports nutrition page to learn more about nutrition and fueling the young athlete.

What Does a Day of Muscle Building Meals & Snacks Look Like?
Specific foods and portion sizes will vary based on an athlete’s size, age, sport and training demands.

Here is a great example. 

Recovery Strategies for Young Gymnasts

Recovery Strategies for Young Gymnasts

Gymnasts have training needs that differ from many other athletes.

The demands on gymnasts typically involve many hours of high-intensity skills training. Not addressing recovery with the same commitment can leave them less prepared for another workout and at an increased risk for injury. Gymnasts and other athletes have to balance training sufficiently with appropriate rest and recovery techniques. Investing valuable time and money into recovery strategies requires thoughtful consideration.

Recovery principles include reducing edema (swelling), improving blood flow, restoring damaged muscle cells, reducing soreness and returning the athlete to a state for optimal training. These are achieved using a combination of these modalities:

  • Compression
  • Massage
  • Cold

Common strategies include:

  • Massage sessions or tools – Generalized massage can be beneficial to circulate the blood and prevent stiffness post-workout. Localized massage, foam rollers or manual therapy can address specific areas of pain or release tense muscles to reduce postural malalignment.
  • Contrast hot/cold pools – Water offers a dual approach to recovery. The immersion provides compression and alternating between warm and cold environments adds the benefits offered by cold therapy. At Scottish Rite, we have HydroWorx® hot and cold plunge pools for our patients.

  • Epsom salt baths – Easy to implement at home, adding Epsom salt (a naturally occurring mineral compound) to a bath offers a combination of the benefits of compression from immersion as well as possible benefits from the absorption of magnesium, which may help to reduce muscle soreness.
  • Combination cold and compression – After an injury or training, RICE (Rest Ice Compress Elevate) is a traditional approach to reduce swelling. Our team uses a GameReady® device which provides both cold and compression.  The device circulates very cold water around the joint or limb while simultaneously mimicking the muscle pumping actions that circulate blood and prevent swelling.
  • Dynamic compression device – Improving on a therapeutic concept of sequential compression to improve blood flow in the legs, companies like Normatec offer a sleeve that applies a wave of pressure to mimic muscle action.
  • Active recovery – Lower intensity exercise after higher intensity exercise may help reduce stiffness, optimize gains made during training and use muscle activation to create the compressive forces to improve blood flow. Examples include:
    • Dynamic (active) or static stretching
    • Swimming
    • Yoga
    • Pilates
    • Cycling

  • Nutrition – Properly timed and pre- and post-workout fueling help optimize the athlete’s recovery:
    • Anti-inflammatory foods that have shown promise in treating muscle soreness: watermelon, cherry juice, pineapple and ginger.
    • Recovery snacks need these three key components:
      • Carbohydrates
      • Protein
      • Fluid

Professional athletes, world-class gymnasts and exercise enthusiasts have appreciated the value of recovery. Young athletes should learn recovery principles and learn to “listen” to how their bodies respond to exercise and modalities to optimize recovery and prepare for the next workout.

Learn more about pediatric sports medicine.